
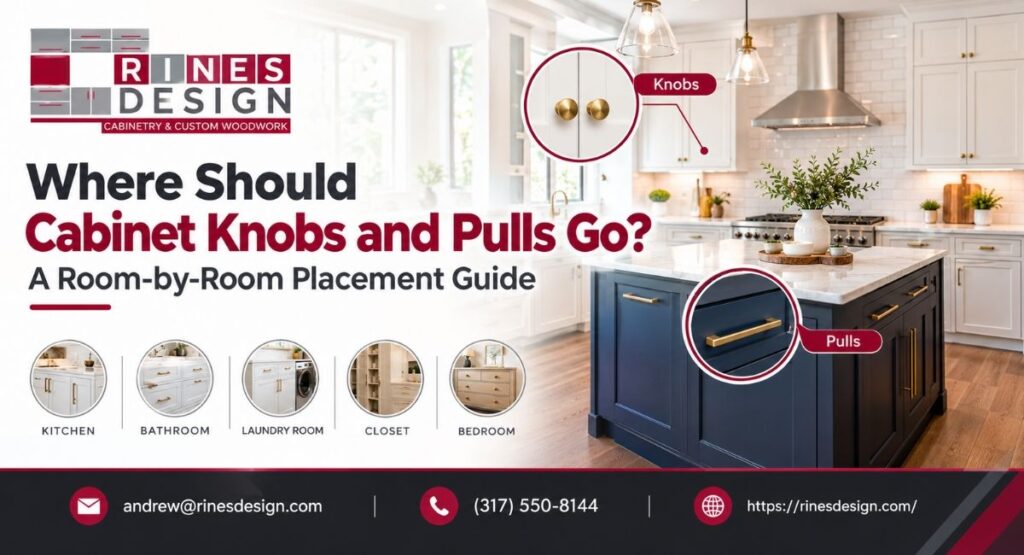
You have the new pulls in a box. The cabinets are installed and finished. You hold the drill and a pencil, and one question stops you: where exactly does this hardware go?
It is a fair question. A hole in the wrong spot cannot be undone. Wood filler and touch-up paint rarely hide it. A crooked row of pulls also draws the eye in a way that good cabinets should not.
Good placement follows a few simple rules. Once you know them, you can plan a whole kitchen in under an hour. This guide covers doors, drawers, tall pantry fronts, and bathroom vanities. It also shows how to build a drilling template so every hole lands in the right place.
Why Cabinet Hardware Placement Matters
Hardware is the part of a cabinet you touch every day. You open a drawer many times before breakfast ends. If the pull sits too high or too low, your wrist feels it.
Placement also shapes the look of the room. Even spacing makes cabinets feel calm and planned. Random spacing makes them feel rushed.
Three goals drive every decision:
- Comfort: Your hand should reach the hardware without strain.
- Balance: Each piece should sit in proportion to the door or drawer.
- Consistency: Matching heights and offsets should repeat across the room.
Keep those three goals in mind. Every rule below supports at least one of them.
Key Terms to Know Before You Drill
A few terms come up often. Knowing them makes shopping and installing easier.
Knob: A single-post piece with one screw. It is small and simple.
Bar pull: A handle with two mounting points. It runs in a straight line.
Cup pull (bin pull): A scoop shaped pull that sits on a drawer front. Your fingers curl up into the cup.
Center-to-center measurement: The distance between the two screw holes on a pull. It is measured from the middle of one hole to the middle of the other. Common sizes include 3 inches, 3 3/4 inches, 5 inches, and 6 5/16 inches (often sold as 160 mm). You may also see 96 mm and 128 mm.
Overall length: The full length of the pull, end to end. It is different from center-to-center. Always check both numbers.
Stile and rail: On a framed door, the stiles are the vertical edges. The rails are the horizontal edges. Hardware often lines up with these parts.
Reveal: The thin gap between doors and frames. If you want more on how door style changes this look, read our guide to inset vs full overlay cabinets.
Concealed hinges: Hinges hidden inside the cabinet. They matter here because the hinge side of a door tells you where a knob should not go.
Start With the Three Placement Rules
Almost every placement choice comes from three habits that designers use daily.
Rule 1: Place Hardware Near the Open Edge of a Door
The hardware goes on the side opposite the hinges. This gives you leverage to swing the door open. A knob next to the hinge makes the door hard to pull.
Rule 2: Place Hardware Near the Counter or Floor Line That Makes It Easy to Reach
Upper cabinet doors take hardware near the bottom corner. Base cabinet doors take hardware near the top corner. Both choices keep the hardware close to where your hand is already moving.
Rule 3: Center Hardware on Drawers
Drawer pulls usually sit in the middle of the front. Horizontal and vertical centers should line up. This keeps the face balanced.
Those three rules cover about 90 percent of cases. The rest of this guide covers the exceptions.
Kitchen Cabinet Door Hardware Placement
Doors are the easiest place to start. The rule is the same for most styles. Choose a consistent distance from the edges, then repeat it everywhere.
Upper Cabinet Doors
Place the knob or pull near the bottom corner of the door. Put it on the side opposite the hinge.
A common spacing is about 2 to 3 inches from the bottom edge and 2 to 3 inches from the open side edge. Many installers use 2 1/2 inches for a standard shaker door.
If you use a vertical bar pull, mount it so the bottom of the pull sits 2 to 3 inches up from the bottom edge. Keep it centered on the stile if the door has a frame.
Base Cabinet Doors
Place the knob or pull near the top corner of the door. Again, mount it on the side opposite the hinge.
The same 2 to 3 inch offset works well. A knob at 2 1/2 inches down from the top edge and 2 1/2 inches in from the side edge is a reliable starting point.
For vertical pulls on base doors, the top of the pull sits about 2 to 3 inches below the top edge. This keeps your hand near the counter height without crowding the drawer above.
Doors With Shaker or Frame Details
On a five-piece shaker door, center the knob on the stile. The stile is the flat vertical strip. This gives a clean, intentional look.
Do not place a knob on the inner edge where the recessed panel begins. The step creates an uneven surface and the hardware may sit crooked.
Double Doors and Corner Cabinets
Two doors that meet in the middle each get their own hardware. Place each piece near the meeting edge, at the same height. Matching height matters here because you see both together.
For a corner cabinet with a single door, mount hardware on the open side. If the door swings near an adjacent door, test the swing before drilling. Hardware can bump a neighboring door or pull.
Glass Door Cabinets
Glass doors often have narrow frames. A knob can look oversized on them. Choose a small knob or a slim pull. Mount it in the stile, not the glass, and keep the offset consistent with your other doors.
Kitchen Drawer Pull Placement
Drawers need more thought than doors. Sizes vary a lot. A shallow utensil drawer and a deep pot drawer should not use the same layout.
Single Pull on a Standard Drawer
For drawers up to about 24 inches wide, use one pull centered on the front. Center it both side to side and top to bottom.
A rough rule for size: the pull should be about one third of the drawer width. A 24 inch drawer fits a pull of about 8 inches overall, though 6 to 8 inches also looks good. A 15 inch drawer suits a 3 to 5 inch pull.
Two Pulls or Knobs on Wide Drawers
Wide drawers are harder to open with one pull. The front can twist. Use two pulls or two knobs on drawers wider than about 30 inches.
Place them at roughly one quarter and three quarters of the width. This gives even spacing from each end. Many designers also place them at one third and two thirds for a tighter look. Either works if you stay consistent.
Deep Drawers
Deep drawers are tall fronts, often 12 inches or more. They hold pots, mixing bowls, and small appliances.
You can place a single pull in the center of the face. Another option is to move it to the upper third. This puts it closer to your hand, which is helpful when the drawer is heavy.
Two pulls work well on deep, wide drawers. Mount them in the same positions as on wide standard drawers, with a matching vertical height.
Cup Pulls on Drawers
Cup pulls often sit on a drawer face in one of two ways. They can mount at the top center of the front, with the cup facing up. They can also mount slightly below the top edge, centered side to side.
Keep the same position on every drawer. Mixed cup heights look like an error.
Aligning Pulls Across Different Drawer Sizes
This is the question people struggle with most. A stack of three drawers has three different heights. Should all the pulls line up at the same distance from the top, or sit in the center of each drawer?
Both approaches are used, and each has a purpose.
- Center each pull on its drawer: This is the most common choice. Each drawer looks balanced on its own.
- Align pulls at the same distance from the top edge: This creates a straight horizontal line across the stack. It looks tidy on tall pantry banks and works well with a bold modern pull.
Pick one method and use it on every stack in the room. Mixing the two methods within one kitchen causes visual noise.
Tall Cabinet and Pantry Front Placement
Tall doors reach from the floor to the ceiling. They need a different rule. A pull at the top corner would be out of reach.
Standard Pantry Doors
Mount hardware at a comfortable hand height. A range of about 36 to 48 inches from the floor works for most adults. Many designers use 40 to 42 inches. This keeps the pull at about waist or lower chest height.
Use a long vertical pull for tall doors. A pull of 12 to 18 inches looks proportional. A knob can look lost on such a large door.
Mount the pull on the open edge, centered in the stile.
Pantry Pull-Out Units
Pull-out pantries slide out as a narrow column. A tall vertical pull on the front is the usual choice. Center it side to side. Set its midpoint near the same hand height of 40 to 42 inches.
If the unit has several drawers inside, you may use a small knob for each section. For help planning interior storage, see our work with custom organization.
Refrigerator Panel Doors and Appliance Fronts
Panel-ready appliances need special care. The door must clear any pulls on nearby cabinets. Mount appliance pulls at a consistent height with your other tall doors. Most appliance makers provide mounting guides, so check them before ordering hardware.
Bathroom Vanity Hardware Placement
Vanities follow the same rules as kitchens. The scale is smaller, though, and sinks and plumbing change the layout.
Vanity Doors
Place the knob or pull near the top corner of the door, on the open side. Use the same 2 to 3 inch offset as in your kitchen.
A vanity under a sink often has false drawer fronts at the top. These do not open. Skip hardware on them. Mounting a pull on a false front is a common mistake.
Vanity Drawers
Center a single pull on each drawer. A drawer next to a sink may be cut out around the plumbing, so the face may look wider than the box inside. Center the pull on the visible face, not the inner box.
For drawers wider than about 30 inches, use two pulls as you would in the kitchen.
Matching Vanity Hardware to the Rest of the House
Many homeowners match vanity hardware to faucet finish. Others match it to kitchen hardware. Either choice works. Keep the size relative to the cabinets, since a vanity door is often smaller than a kitchen door. A pull that looks right on a 24 inch kitchen drawer may feel heavy on a 15 inch vanity drawer.
If you are planning a full bath upgrade, our custom vanities can be built with hardware locations in mind from the start.
Quick Reference: Hardware Placement by Cabinet Type
This table summarizes the common starting points. Treat the numbers as a guide, then adjust for your door style and hardware size.
| Cabinet Type | Hardware Position | Typical Measurement |
| Upper door | Bottom corner, open side | 2 to 3 inches from bottom and side edges |
| Base door | Top corner, open side | 2 to 3 inches from top and side edges |
| Drawer up to 24 inches wide | Center | One pull, centered both ways |
| Drawer over 30 inches wide | Two pulls | At about 1/4 and 3/4 of width |
| Deep drawer | Center or upper third | One or two pulls |
| Tall pantry door | Open edge, hand height | 36 to 48 inches from floor |
| Vanity door | Top corner, open side | 2 to 3 inches from top and side edges |
| Vanity drawer | Center | One pull, centered both ways |
How to Make a Hardware Layout Before You Drill
A plan on paper saves a lot of regret. A template turns that plan into holes that line up exactly.
Step 1: Choose Your Hardware First
Buy the hardware before you plan the layout. Pull length, center-to-center size, and post style all affect placement. A change after drilling is expensive.
If you cannot decide, order samples. Hold them against the door. Check the look from several feet away, as you would see it in daily use.
Step 2: Measure Every Door and Drawer Front
Write down the width and height of each front. List them by location, such as “left of sink, base door” or “top drawer, far right.” A simple sheet of paper or a spreadsheet works well.
Look for repeating sizes. Many kitchens use only five or six sizes. This reduces the number of templates you need.
Step 3: Set Your Offsets
Choose one offset for doors and one rule for drawers. For example, you might pick 2 1/2 inches from each edge for doors, and center for drawers.
Write these numbers at the top of your sheet. Refer to them every time.
Step 4: Build a Drilling Template
A drilling template is a guide that holds your drill bit in the right spot. You can buy an adjustable jig at most hardware stores. Or you can make a simple version from scrap wood or thick cardboard.
To make one, follow this layout. Cut a piece of scrap to match the size of one door. Mark the offset lines from two edges. Drill the hole at the point where those lines cross. Clamp the template to each door and drill through it.
For pulls, mark two holes at the right center-to-center distance. Test the template on a piece of scrap first. Check that your pull screws fit.
Step 5: Use a Printable Layout Sheet
A printable sheet keeps you organized. Draw a grid with one row for each cabinet. Fill in the columns as shown below.
| Cabinet Location | Door or Drawer | Width x Height | Hardware Type | Center-to-Center | Mark From Top | Mark From Side |
| Left of sink | Base door | 15 x 30 in | Knob | n/a | 2 1/2 in | 2 1/2 in |
| Top drawer, center | Drawer | 24 x 6 in | Bar pull | 5 in | Center | Center |
| Pantry | Tall door | 18 x 84 in | Vertical pull | 12 in | 40 in from floor | Center of stile |
Print one sheet for each room. Keep it with you while you work. Check off each cabinet after you drill.
Step 6: Test on One Door
Drill one door and install the hardware. Step back and look at it. Open and close the door. Check that your hand fits and that nothing bumps the neighbor.
If it looks right, move on. If not, adjust the numbers before you drill the second door.
Common Hardware Placement Mistakes and How to Avoid Them
Most errors fall into a handful of patterns. Knowing them helps you avoid them.
Drilling before you test. Always test your layout on one piece first. A single scrap or one back-of-cabinet door can save a full set.
Ignoring screw length. Cabinet doors are usually about 3/4 inch thick. Standard screws are often too long or too short. Drawer fronts may be thicker, especially if they have a double front. Check the screw length that came with your hardware. Buy the right size if needed.
Mixing up center-to-center and overall length. A “5 inch pull” may mean either measurement. Always read the product spec. Confirm that your existing holes match if you are replacing old hardware.
Placing pulls too close to the edge. A pull near an edge can interfere with a neighboring door or drawer. Leave enough space for fingers to grip.
Skipping the swing test. Doors with knobs near the corner can hit nearby pulls. Open every door in your plan before you drill.
Inconsistent offsets. A difference of 1/4 inch between neighboring doors is easy to see. Use a template. Do not rely on a ruler for every hole.
Putting hardware on false fronts. Sink bases and some vanities have panels that do not open. Skip these.
Forgetting hinge location. If you flip a door during installation, the knob may end up on the hinge side. Check the hinge direction before you mark.
Replacing Hardware on Existing Cabinets
Many homeowners update hardware without replacing cabinets. This is one of the least expensive ways to refresh a kitchen. A few extra steps help.
Reusing Existing Holes
If the new pulls match the old center-to-center size, the job is simple. You can swap them with no new drilling.
If the new pulls have a different size, you have two options. You can fill the old holes and drill new ones. Or you can use a backplate, which covers the old holes and holds the new pull.
Filling Old Holes
Fill old holes with wood filler. Sand smooth. Touch up with paint or stain that matches the finish. On painted cabinets, a small repair is easy. On stained wood, the match may be harder. Consider a backplate in that case.
Switching From Knobs to Pulls
Changing from a knob to a bar pull means two holes instead of one. Plan the new hole position carefully. The old hole may become one of the new holes, or it may be hidden by the new pull.
If you are updating a kitchen on a tight budget, see our approach to cabinets for every budget. It shows how finish and hardware choices can change the look without a full rebuild.
Style Notes: Knobs, Bar Pulls, and Cup Pulls
Hardware style affects how you place it. Each type has its own habits.
Knobs
Knobs suit traditional, farmhouse, and transitional kitchens. They are easy to place. Use them on doors and small drawers. On wider drawers, use two.
Bar Pulls
Bar pulls fit modern and transitional looks. They work on both doors and drawers. Orient them vertically on doors. Orient them horizontally on drawers.
Cup Pulls
Cup pulls belong on drawers. They look best on traditional, farmhouse, and cottage kitchens. Use them with knobs on neighboring doors. This mix is a classic pairing.
Mixing Hardware Types
Many kitchens use knobs on doors and pulls on drawers. This works well. Keep the finish the same. Keep the size in proportion. Avoid more than two types in a single room.
Hardware Placement and Cabinet Style
Cabinet design affects what looks right.
Inset cabinets have a visible frame and tight reveals. Smaller hardware often looks best. Place it carefully to avoid the frame.
Full overlay cabinets have wide door faces. Longer pulls and bold knobs look good. There is more room to work.
Flat slab doors suit minimalist hardware. Edge pulls and long bar pulls are common. Some designs use no visible hardware at all.
If you are choosing a style and want help planning the details, our custom kitchen cabinetry in Indianapolis team can map hardware locations during the design stage. This avoids guesswork later.
Industry Guidance Worth Checking
Professional designers follow published guidelines for comfort and access. The National Kitchen & Bath Association provides planning standards for kitchens and baths. These cover clearances, reach ranges, and accessibility. They are a useful reference when you plan a layout for a family with children, older adults, or anyone with limited grip strength.
Frequently Asked Questions About Cabinet Hardware Placement
How high should cabinet knobs be on kitchen doors?
On upper doors, place the knob 2 to 3 inches up from the bottom edge. On base doors, place it 2 to 3 inches down from the top edge. Keep it on the open side of the door.
Where should drawer pulls go on a kitchen drawer?
Center a single pull on the drawer front. On drawers wider than about 30 inches, use two pulls placed at about one quarter and three quarters of the width.
What is the best height for kitchen drawer pulls?
For most drawers, center the pull vertically on the front. On deep drawers, you can move it to the upper third to make it easier to reach.
Should knobs go on the top or bottom of cabinet doors?
Knobs go near the top on base cabinets and near the bottom on upper cabinets. This keeps them close to the counter, where your hand naturally moves.
How do I align cabinet hardware across different drawer sizes?
Choose one method and use it everywhere. You can center each pull on its drawer, or align all pulls at the same distance from the top edge of each drawer. Both work. Do not mix them.
How far from the edge should a cabinet pull be placed?
For doors, 2 to 3 inches from the edge is a reliable range. For vertical pulls on shaker doors, center the pull on the stile.
Do I need a drilling template?
It is strongly recommended. A template keeps every hole consistent. It costs little and prevents expensive mistakes.
Where do pulls go on pantry doors?
Mount them at a comfortable hand height, usually 36 to 48 inches from the floor. Many designers choose 40 to 42 inches. Use a long vertical pull for a tall door.
Should vanity hardware match kitchen hardware?
It can, but it does not have to. Match the finish if you want a unified look. Scale the size to fit the smaller vanity fronts.
Plan First, Drill Second
Cabinet hardware placement comes down to a few habits. Put hardware on the open side of the door. Keep it close to the counter line. Center it on drawers. Use one consistent offset throughout the room.
Choose your hardware first. Measure each front. Write your numbers on a layout sheet. Build a template and test on one door before you commit. Take your time on the first hole, and the rest will go quickly.
If you want help with the layout, or you are planning new cabinets, talk with the team at Rines Design. We build custom cabinetry for kitchens, vanities, pantries, and built-ins across Indianapolis and Central Indiana. We can plan hardware placement as part of the design, so every pull sits where it should from day one. Call or request a consultation to start your project.